Configuration method/demonstration: One App for Management of Contact Person/Company Information
This page provides an explanation of how to configure the plugin and a post-configuration demonstration for cases where the app build used is "One App for Management of Contact Person/Company Information"
Prior setup and information to be prepared
Please continue reading this page with the plugin installed on the kintone subdomain you used for the trial or entered in your application.
Please also have ready the API for the linked Sansan system.
-
Adding plugins to kintone
Please refer to "Adding Plugins to System Management" on the kintone help page.
-
Issuance of Sansan API key
Click this link while logged in to Sansan to go the API key issue page.
Reference:Sansan API Documentation: Issuing API Keys
Required fields to be added to the app in advance.
In the plugin, in addition to the fields for managing normal company information and contact person information,
there are fields required for the plugin to keep Sansan data and kintone data linked at all times.
Refer to the following required fields and field mapping information,
and add the necessary fields to the target app (app that manages both person information and company information) before proceeding to the plugin setup work.
-
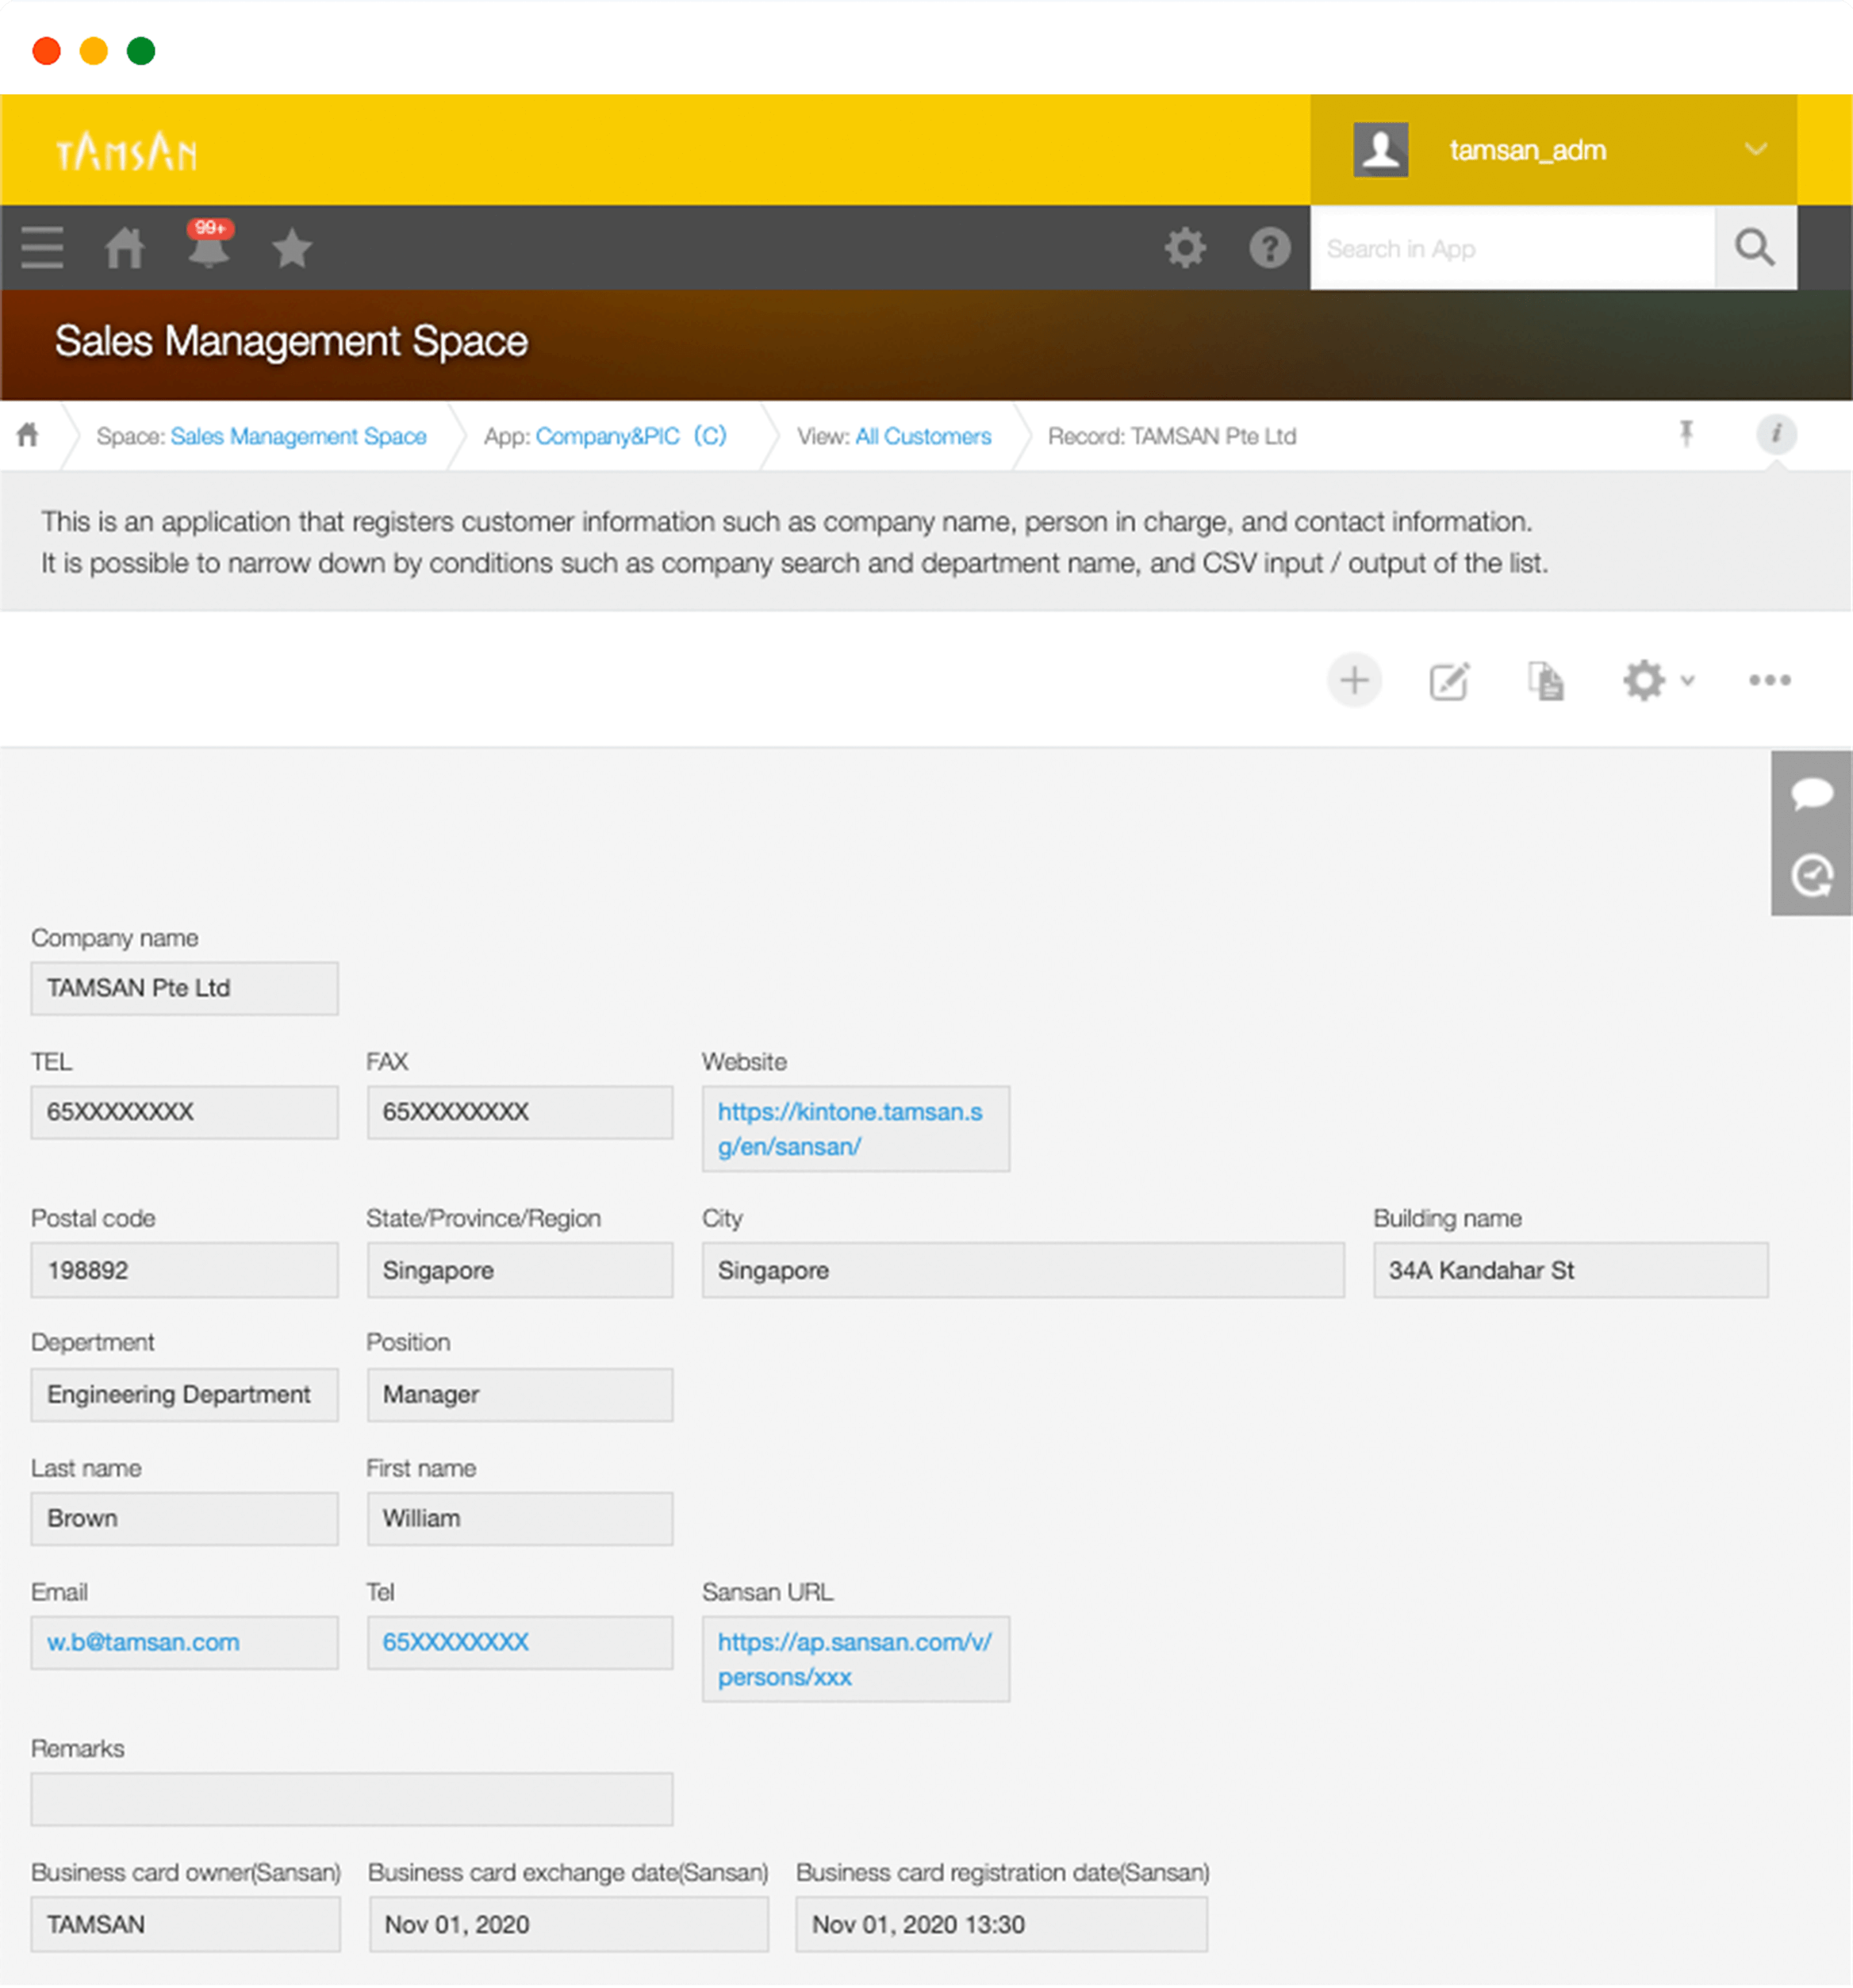
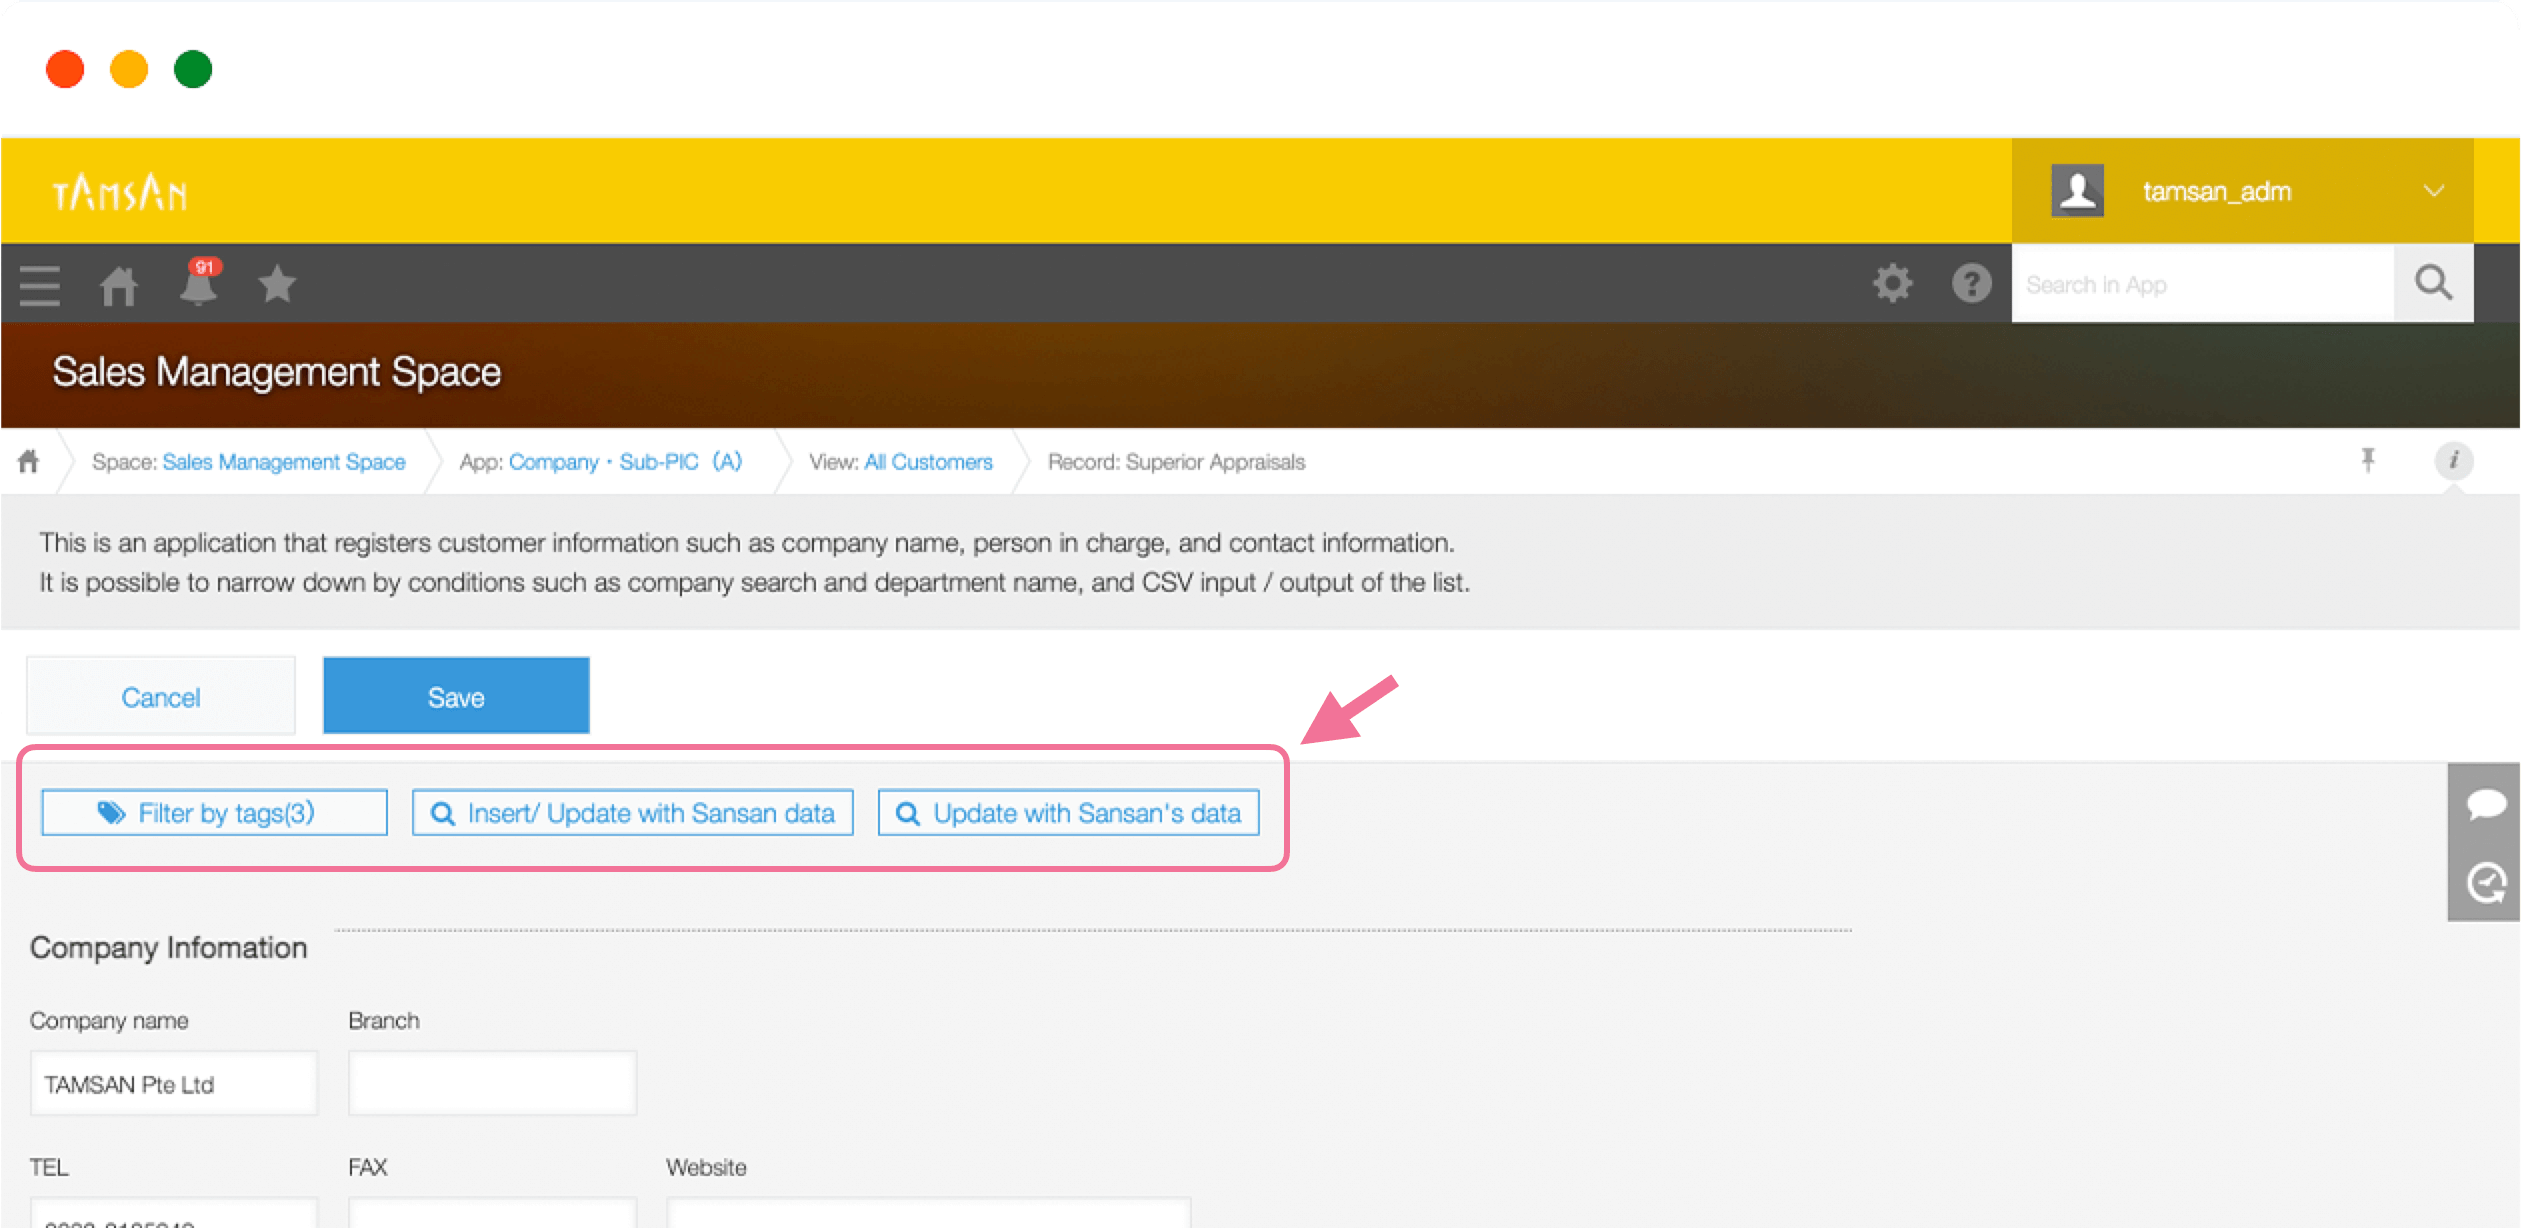
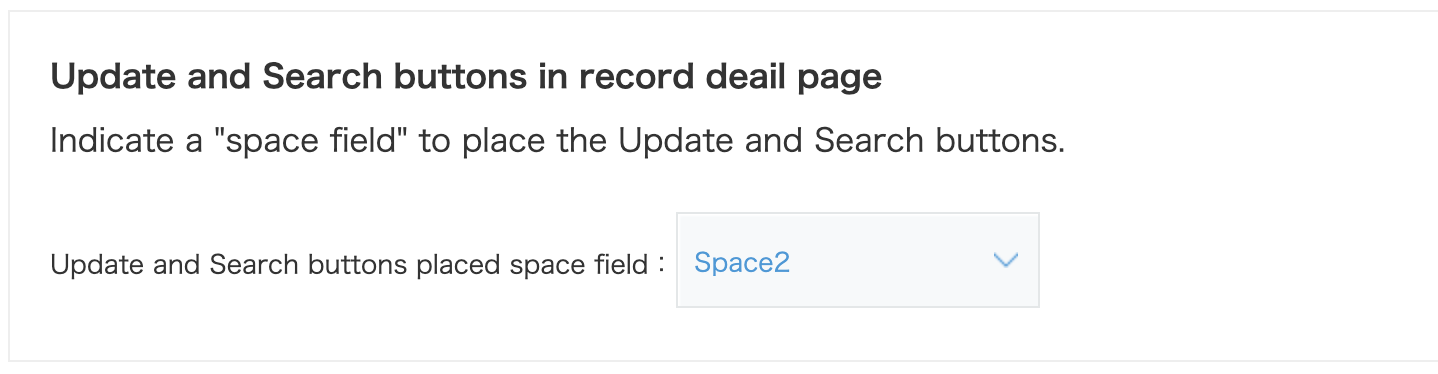
Space-type field for search button (required)
A field to create a button to insert data and update values based on Sansan data on the record detail page edit screen. It will be displayed as shown in the red frame below.
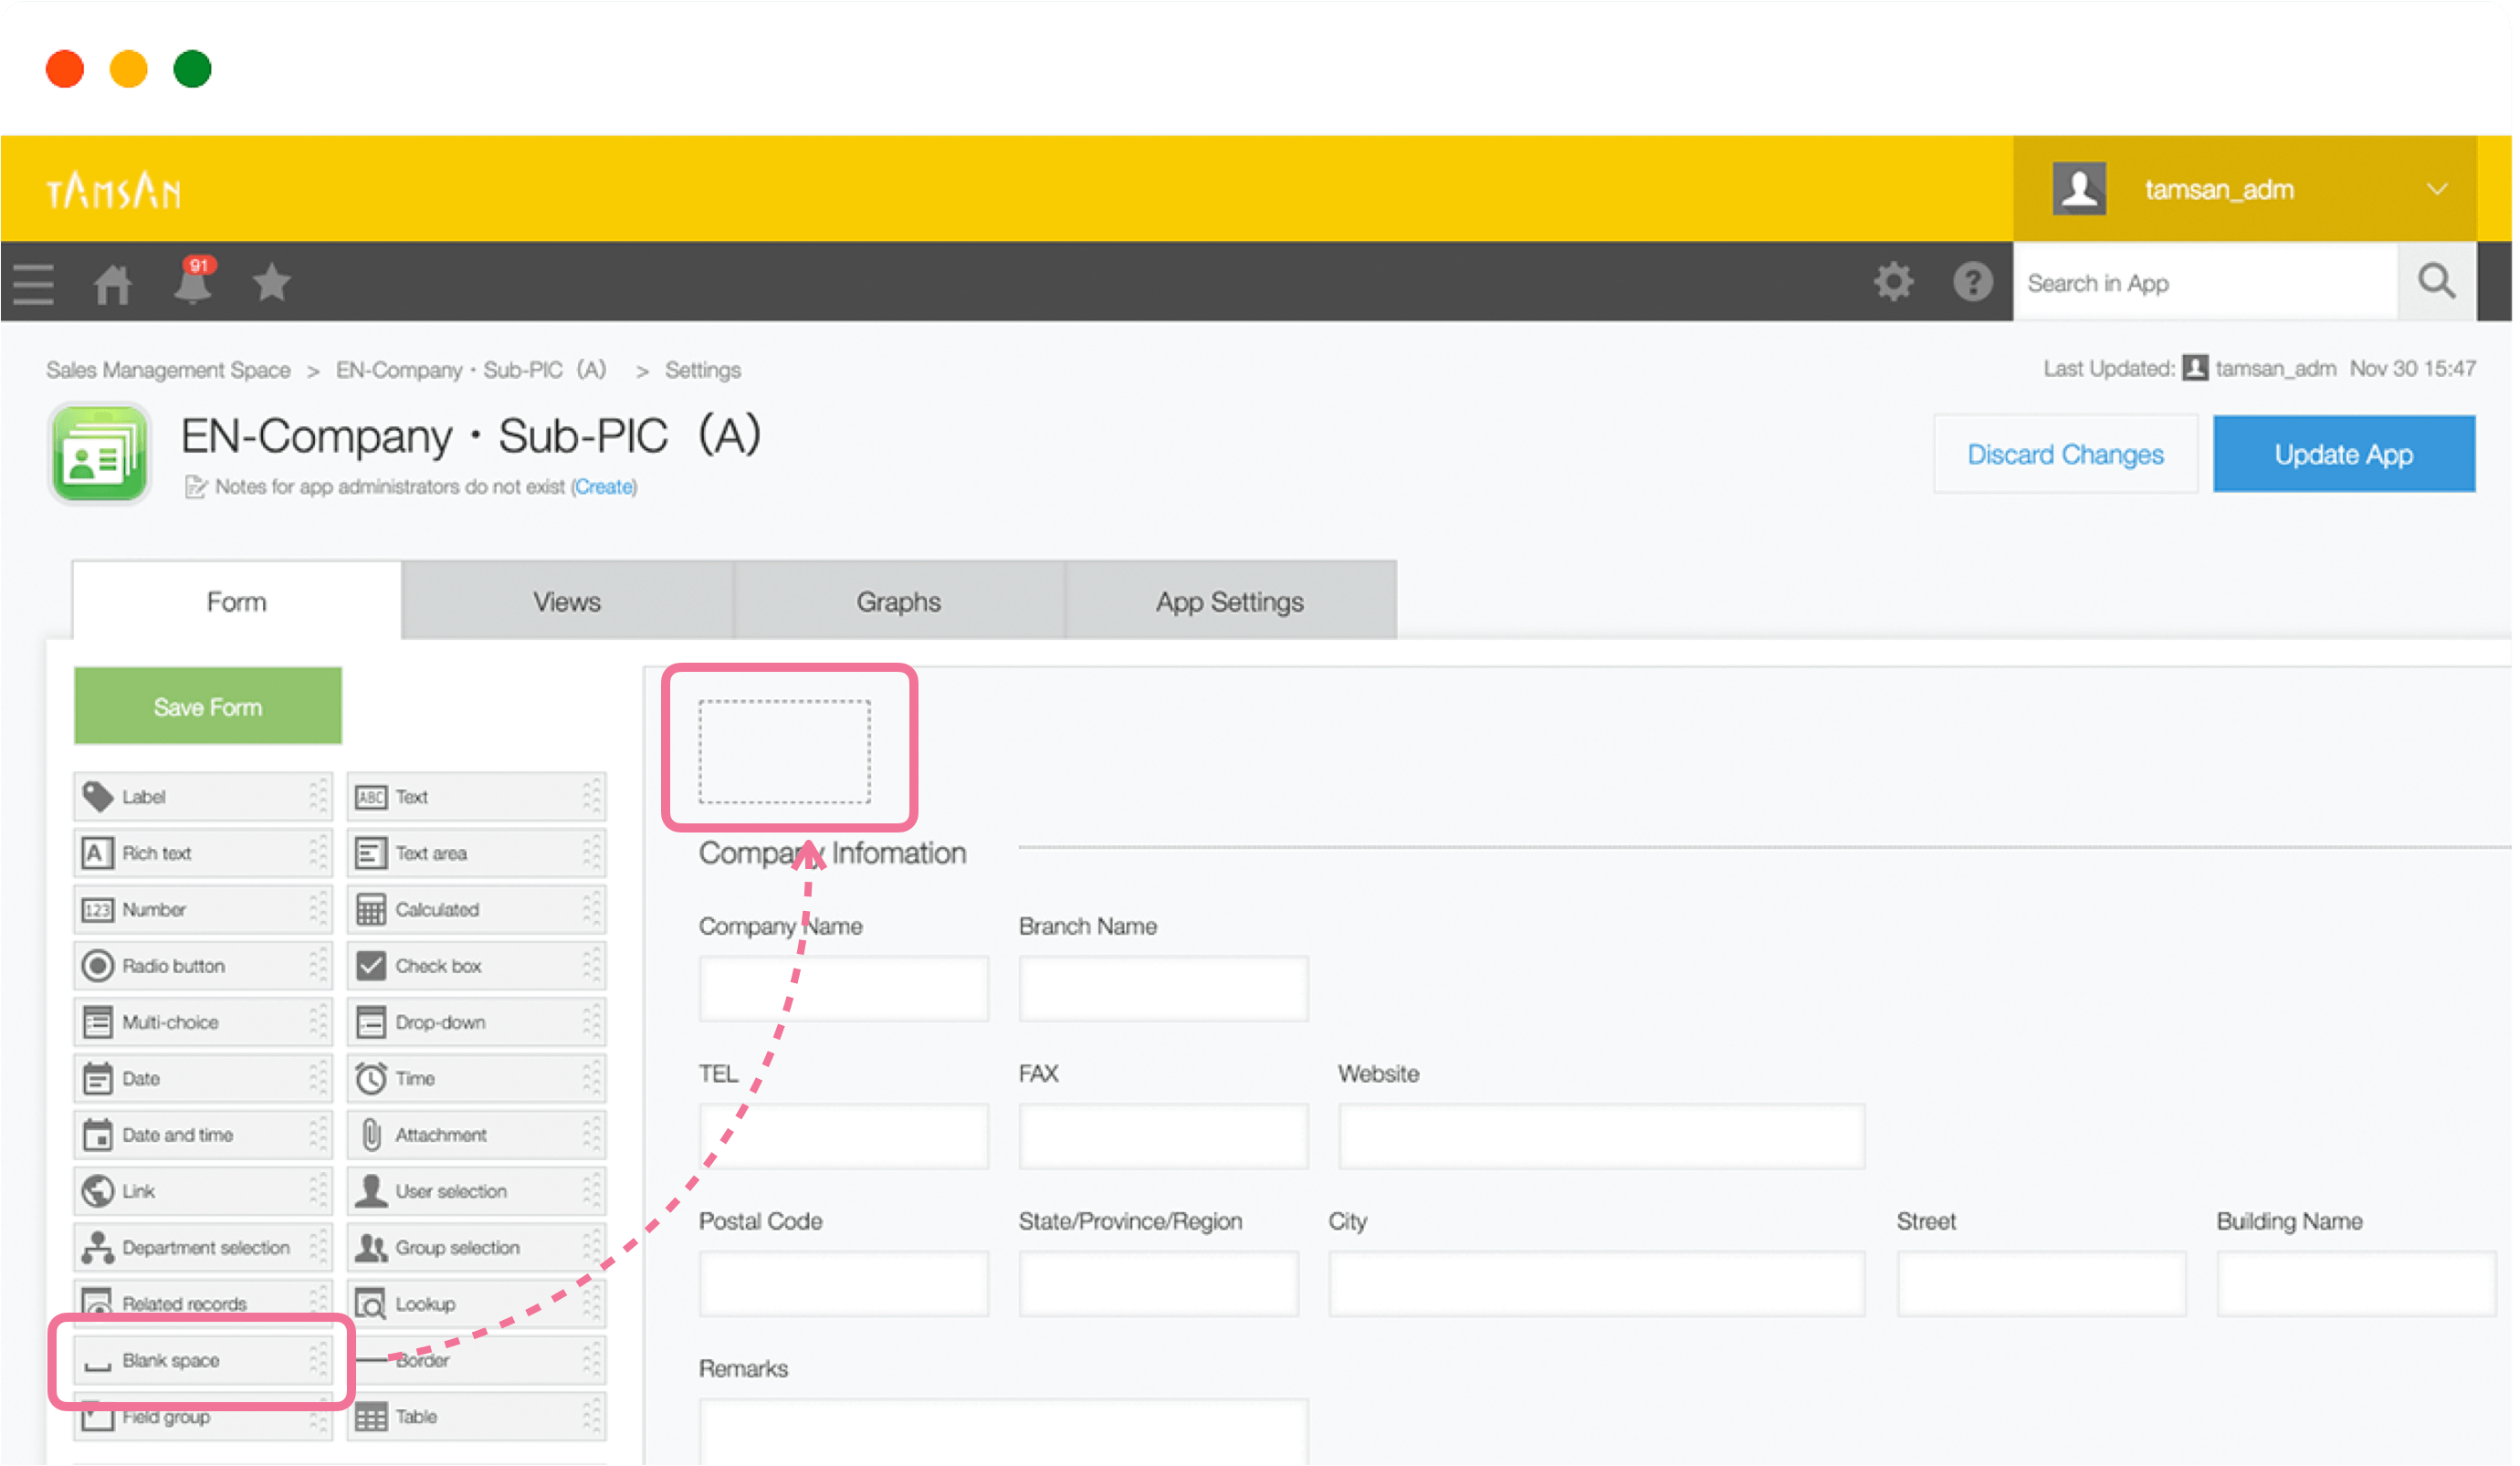
Please keep the following for reference.
The following items are configured on the plugin setup screen.
-
Personal ID(required)
In order to link kintone app contact person information with Sansan personal information,
please prepare the key information in text format.
For other Configurable Fields, see "kintone and Sansan Field Mapping Materials" and "List of Configurable Fields" below.
kintone and Sansan Field Mapping Materials
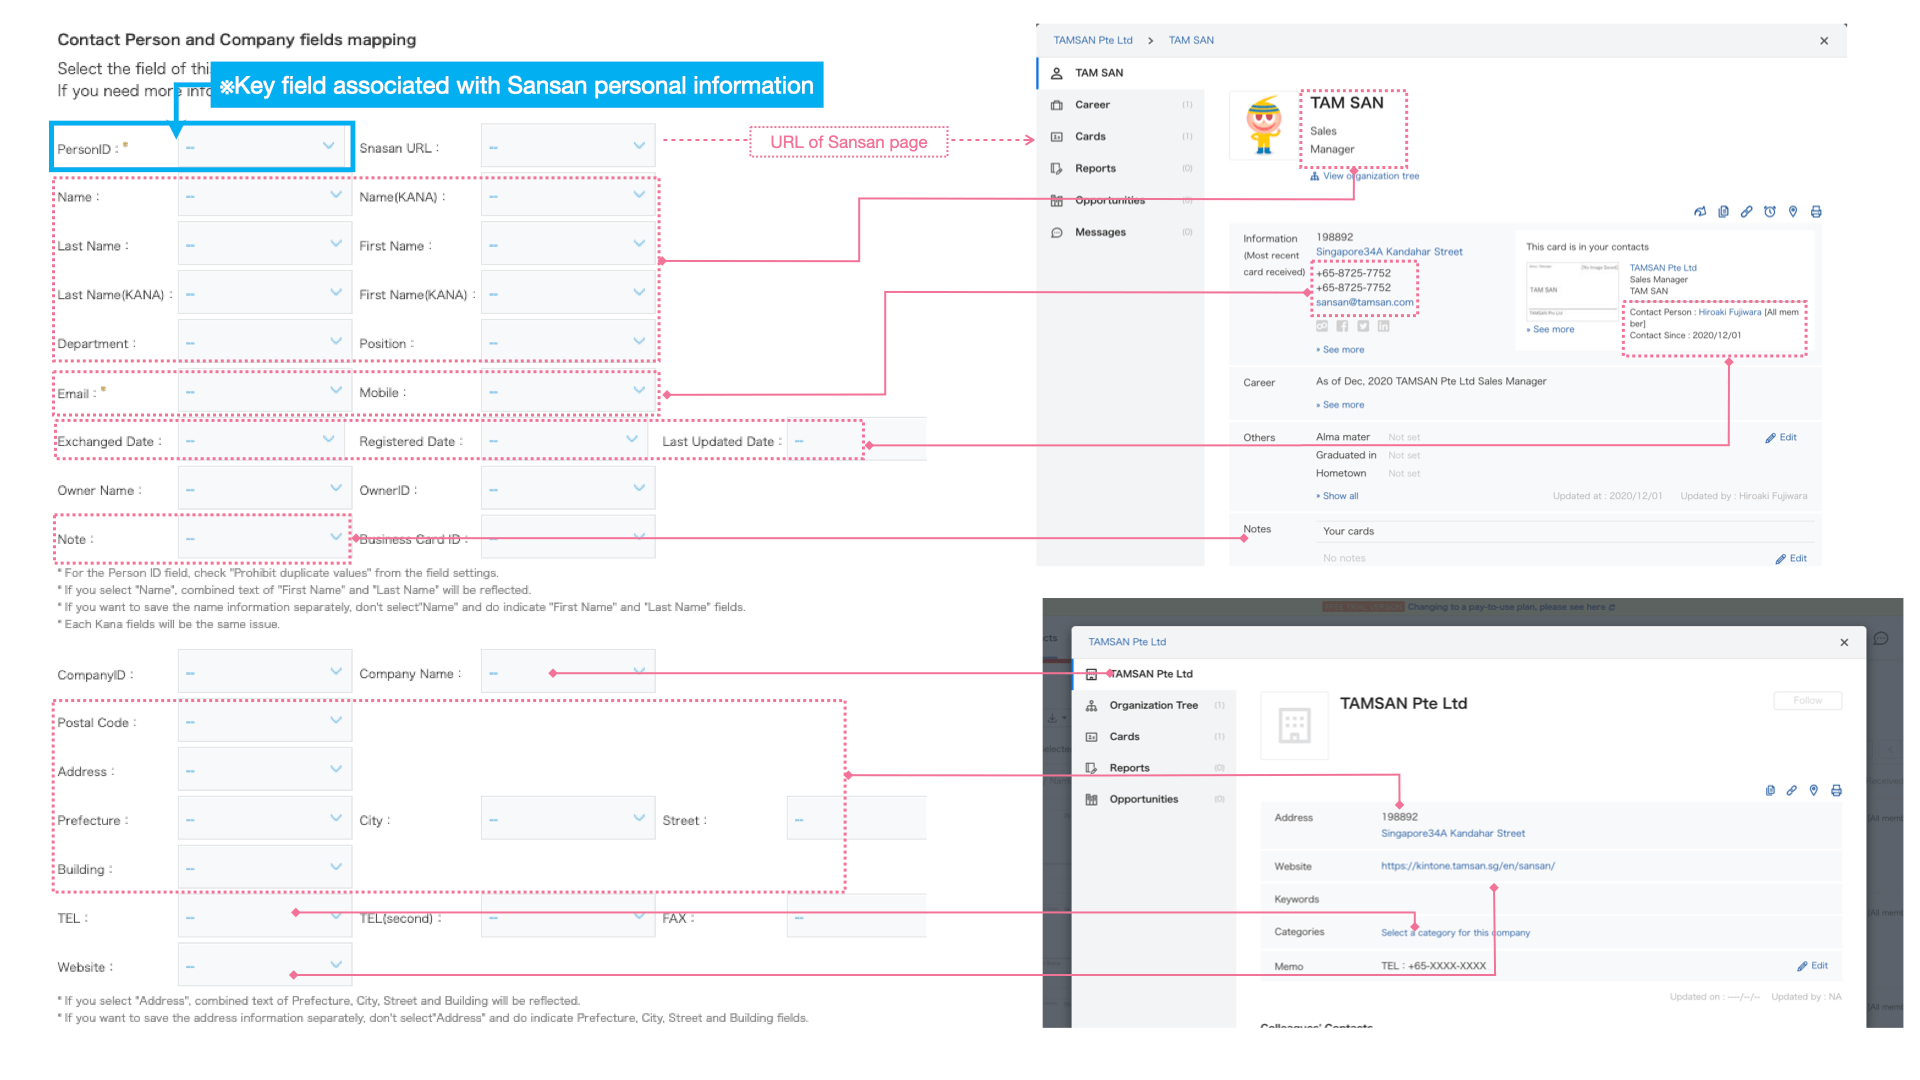
Click the image to enlarge.
List of Configurable Fields on the Sansan with kintone Settings Screen (PDF file)
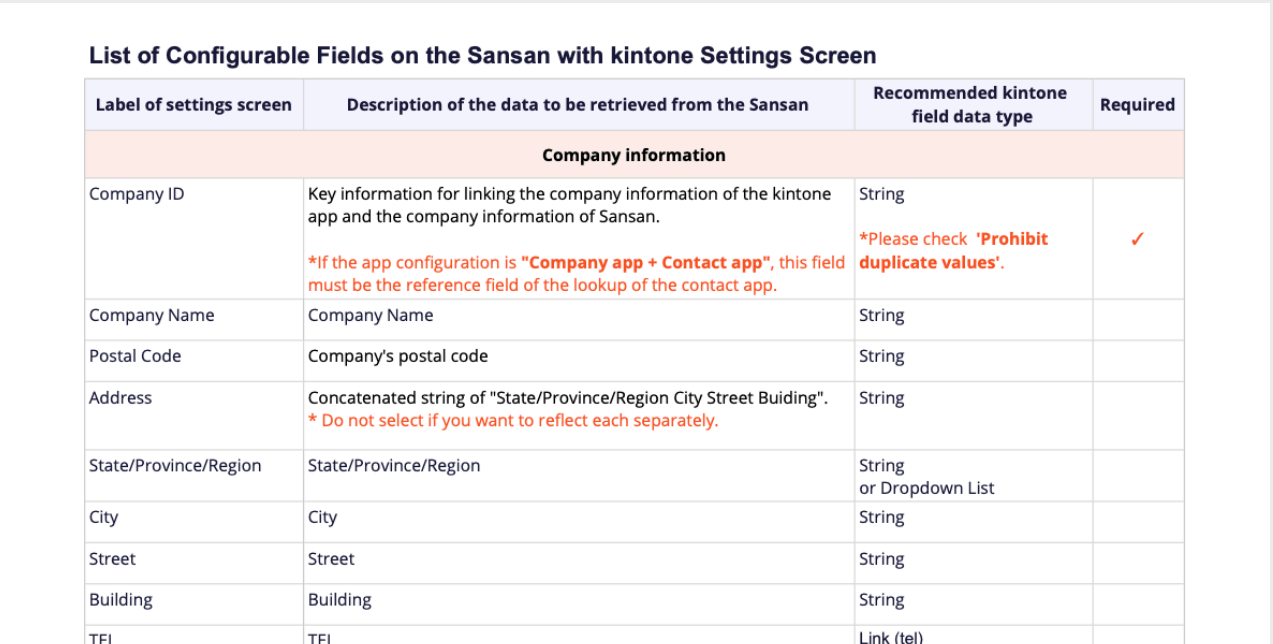
Click the image to enlarge.
If you have the data you want to import and there is no input field in the kintone app,
we recommend that you add it at this time to facilitate setup.
Advance preparations are now complete! Please move on to plugin setup.
Plugin Settings
1. Adding the Plugin to the App
Follow the steps below to add the plugin to the target app
※Please refer to "Adding Plugins to System Management" on the kintone help page for adding the plugin to the kintone system.
2. Plugin Settings
Follow the steps on the slide below to complete plugin setup.
Reference(repost):
・
Mapping kintone fields and Sansan data
・
List of Configurable Fields on the Sansan with kintone Settings Screen (PDF file)
Plugin setup is now complete! Now confirm that it runs.
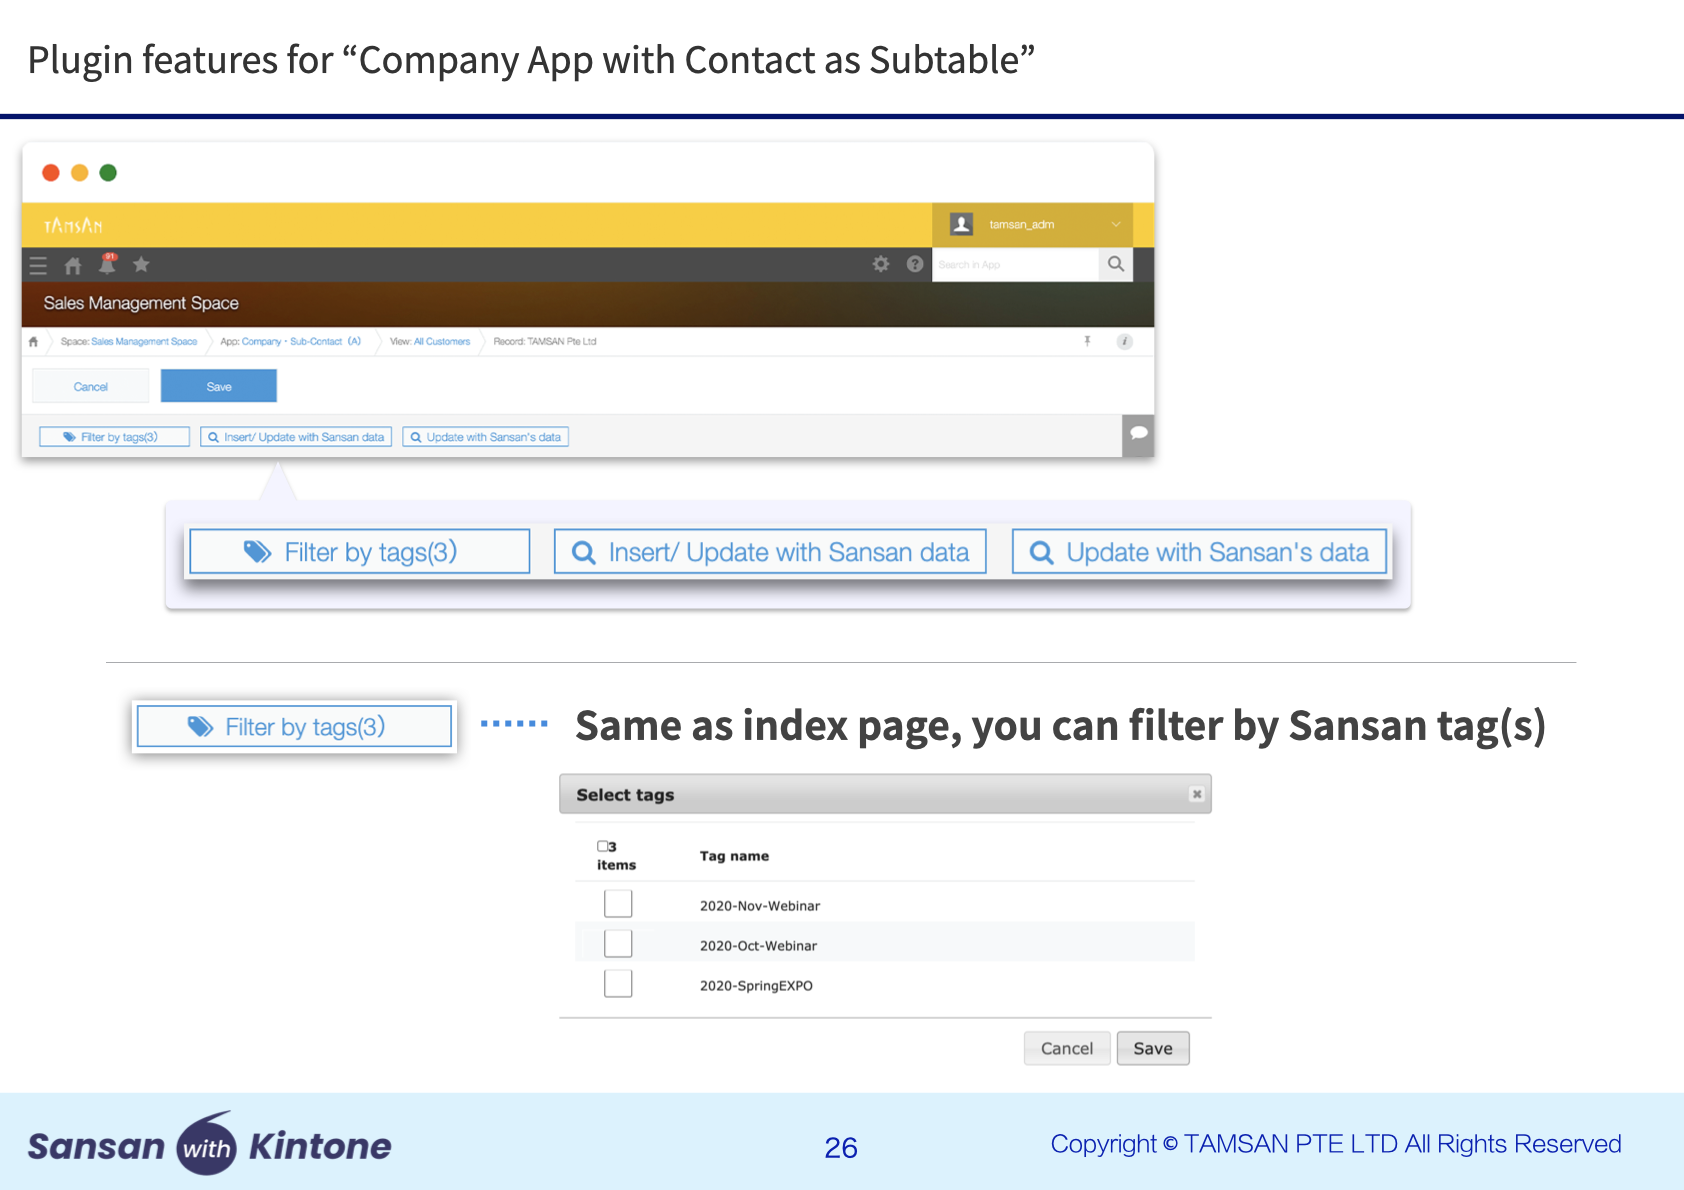
Plugin Functions
Once plugin setup is properly completed, you can check that the buttons are displayed on the dashboard screen and detailed screen of the target app.
Please refer to the following slides for detailed information for each feature.
The following is an overview of the primary features:
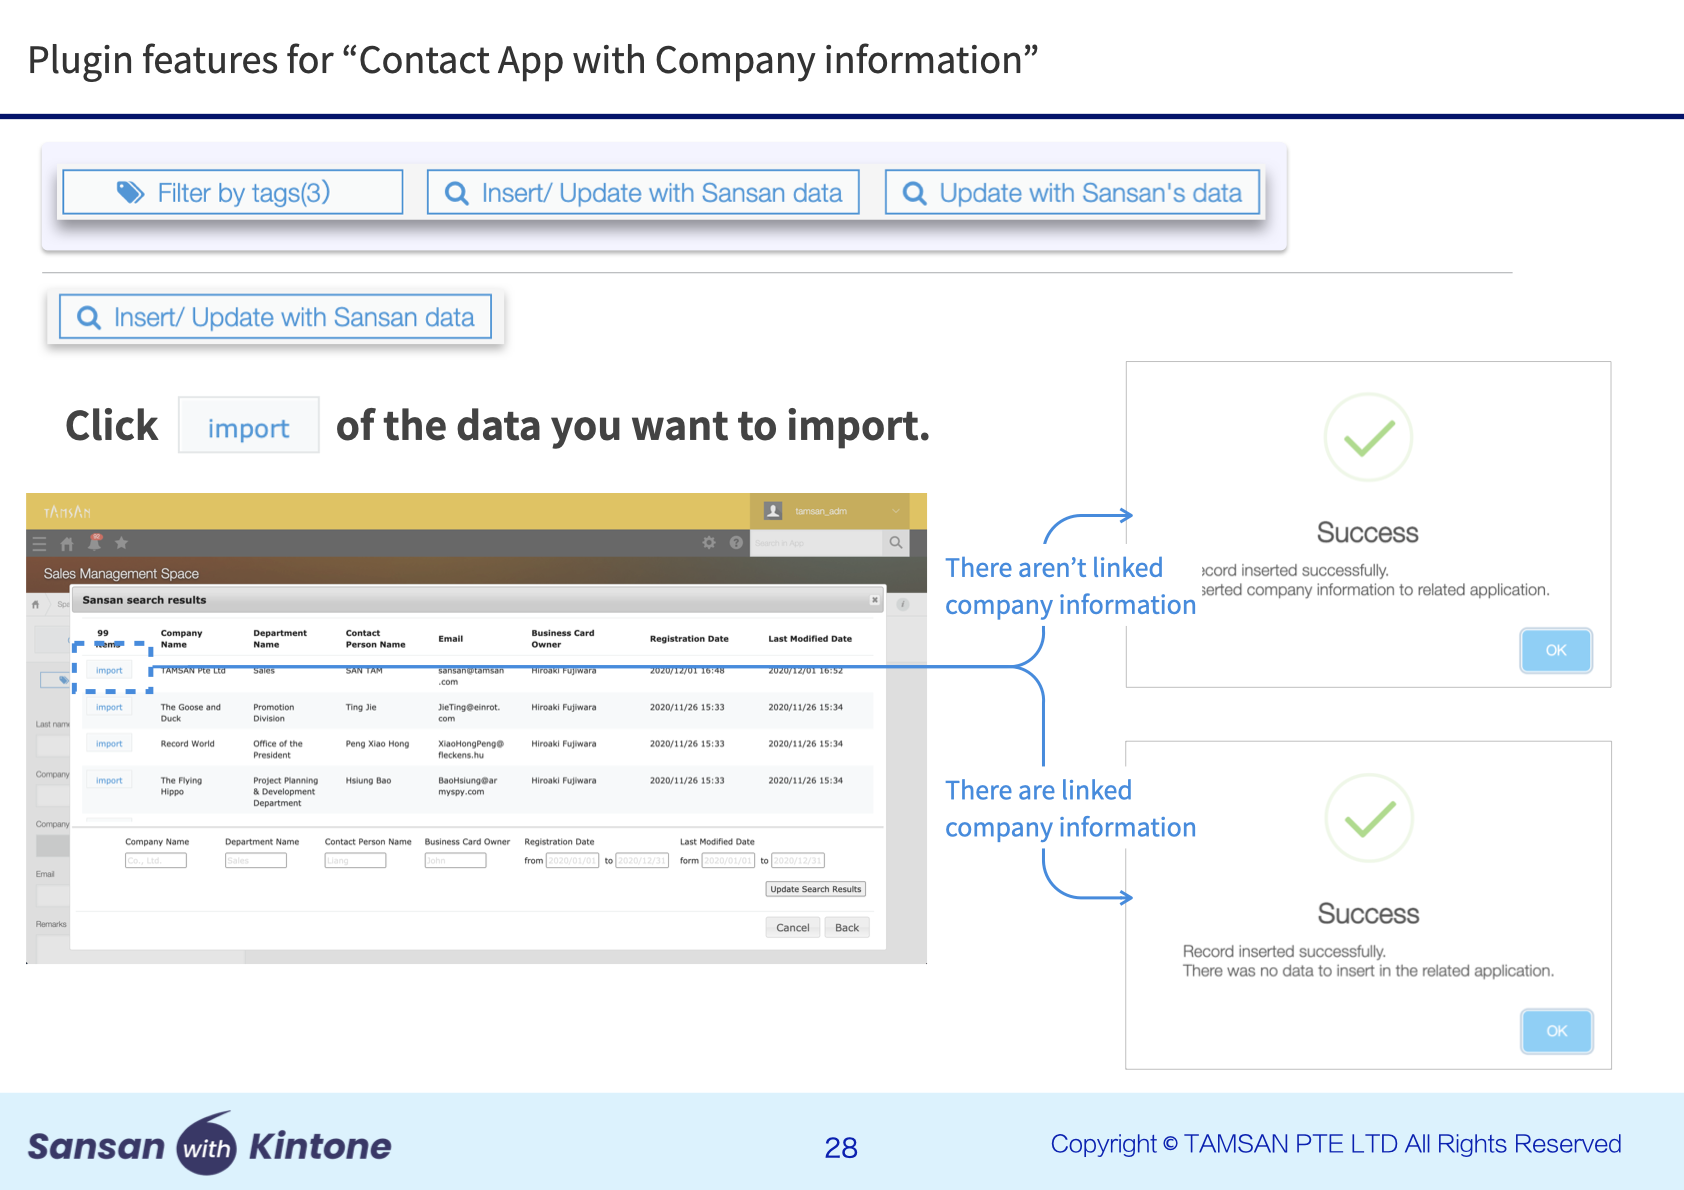
1. Bulk new registration / bulk updating / bulk registration & updating of Sansan data in kintone


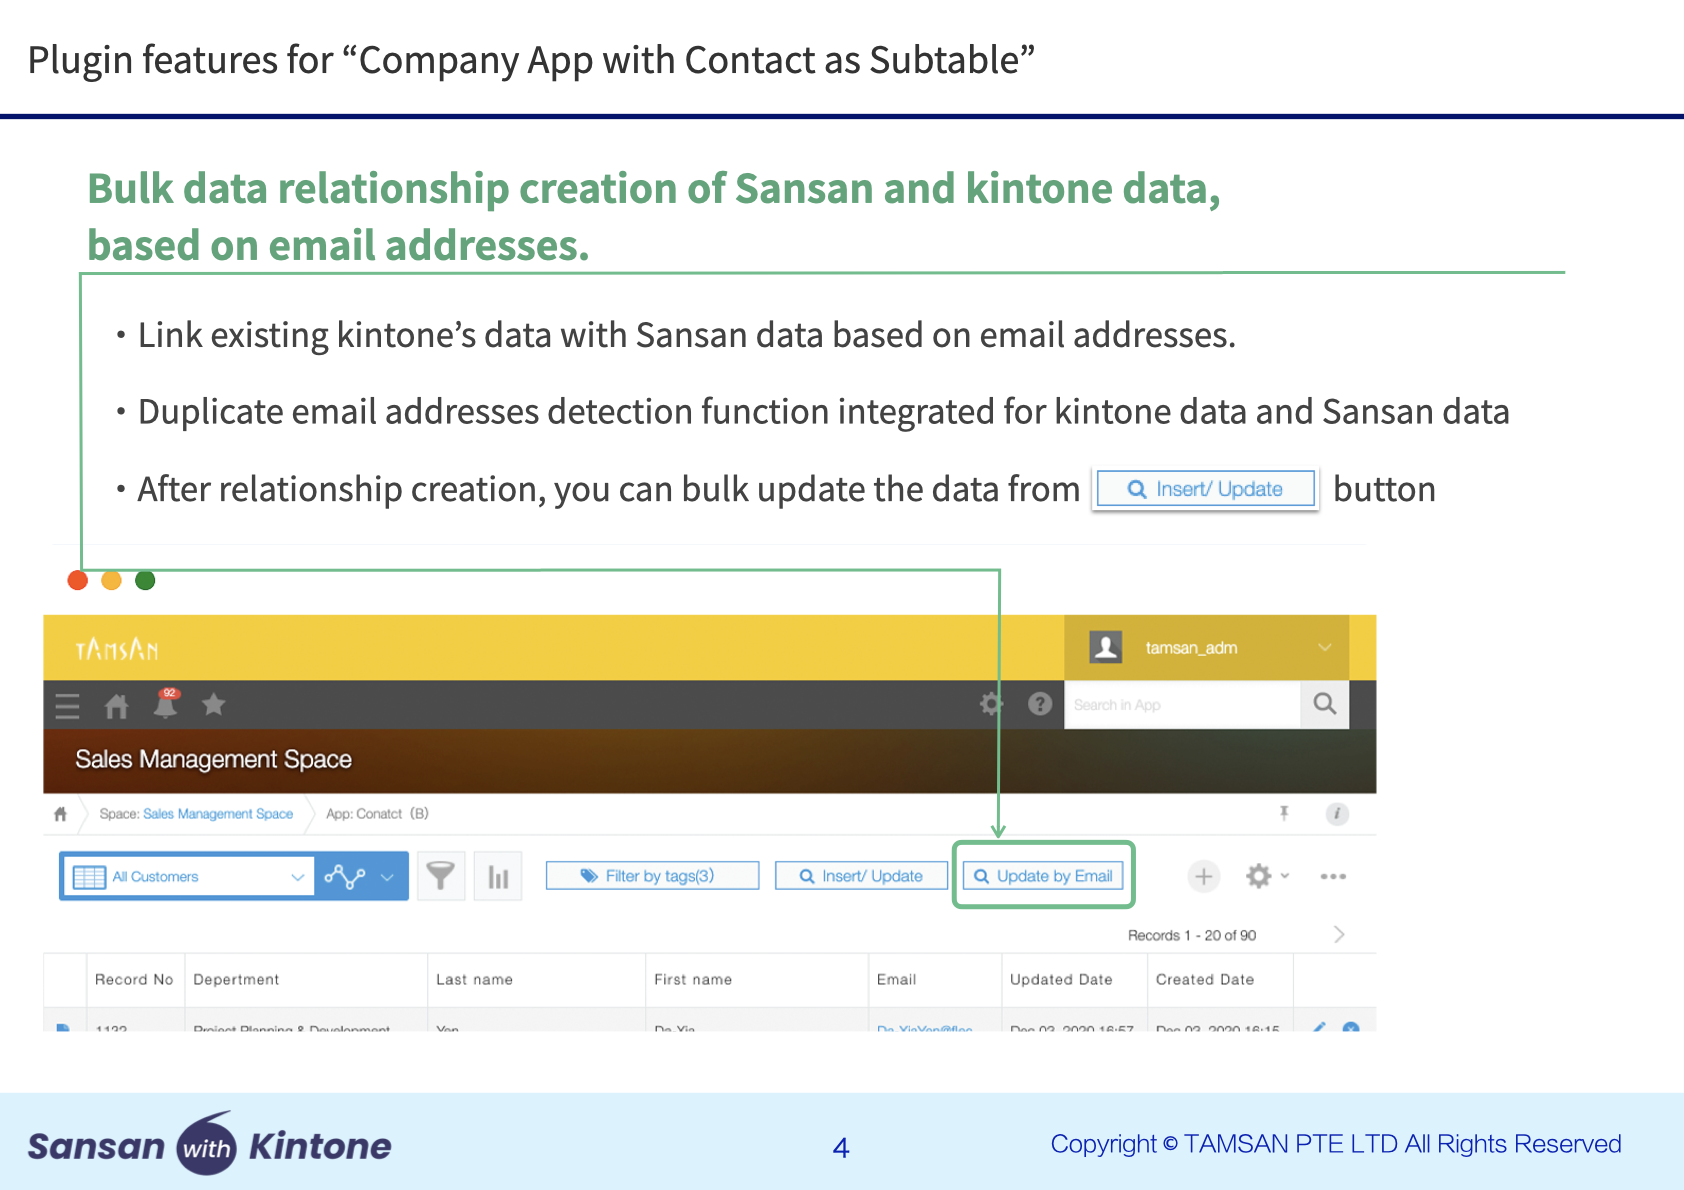
2. Link kintone data and Sansan data in bulk using you email address

3. Link and update kintone data with Sansan data at the company level